Stretching your own canvas is a simple process and a great way to save on supply costs if you paint a lot. Whenever possible I purchase supplies in bulk to take advantage of quantity price breaks. For example, you can save up to 30%, or more, on canvas when you order 10-yards or more at one time.
Parts list
- stretcher bars (usually purchase ready made stretchers)
- tape measure
- canvas or linen (most often I use 100% cotton duck canvas in an 8 oz. or 10 oz. weight)
- smooth work surface (floor or table)
- staple gun and staples
Preparation
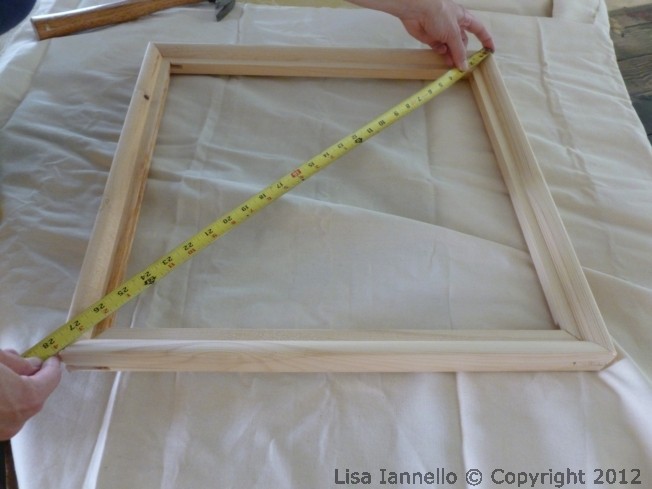
- Assemble stretcher bars into a frame by making sure they are square, either by using a framing square or making sure the measurement is the same from corner-to-corner, (pic 1)
- place the stretcher frame onto a piece of canvas making sure to leave enough canvas to wrap around the stretchers on all sides, (pic 2) cut the canvas to size.
- Starting in the center of one side, staple the canvas the back side of the stretcher frame with a few staples (pic 3). Then, go to the opposite side just stapled, stretch the canvas and place a few staples (pic 4). Repeat on the other two sides, stretching as you go. You should be pulling the canvas tight enough so you need to hold it in place while stapling, but not so tight that the canvas is in danger of ripping. Keep going, working your way toward the corners.
- Finished corners are neat and do not distract from the artwork and make it easy to frame. I have been finishing the corners in the following way for many years but there are several other techniques. Use the one that works best for you. I fold in canvas at a 45 degree angle (pic 5) and then fold again to form a fold on the corner (pic 6). When finished the canvas should be tight enough to sound a little like a drum when tapped in the center. From here you can prime the canvas with gesso (pic 7)


